


How to lay boundary wire around trees and obstacles comes down to one loop: run the wire from the lawn edge out to the obstacle, go around it once, and return along a parallel path without crossing. Whether you need that loop at all depends on the obstacle. Sturdy trees with no visible roots often need no wire, while flower beds and other things a mower cannot bump need an island.
The short answer
- Decide: sturdy trees with no visible roots often need no island, while beds and rockeries do.
- Clear: keep the wire about 10-15 cm (4-6 in) from beds and hedges, and about 30-35 cm (12-14 in) from walls and tall stones.
- Route: go out, circle once, and come back along a parallel path.
- Check: never let the two runs cross, and bury the wire about 4-5 cm (1.5-2 in) deep.
Do trees and obstacles need an island?
The first question in how to lay boundary wire around trees and obstacles is whether the object needs wire at all. Not always. An island is a loop of boundary wire that tells the mower to stay out of an area, and it is most useful for things the mower cannot safely bump. Husqvarna recommends islands for flower beds and rockeries, but says a tree does not always need one because the mower handles gentle bumps. Its one condition is that the tree has no visible roots that could damage the cutting blades. For more on how mowers cope with canopy and trunks, see robot mowers working under trees.
Robomow takes a similar view for smaller objects. Its installation guide says small obstacles need no wire at all, and a bed with borders a few centimeters high can be left unmarked because the sensors handle the collision. Use this quick check before you cut any wire:
- Tree with no roots at the surface: usually no island, the mower will turn after a bump.
- Tree with roots showing: island it, because roots can damage the blades.
- Flower bed or rockery: island it, since a mower can push into soft plants (more in mowing around flower beds).
- Pond or raised stone: island it, and add a physical barrier where a fall is possible.
Clearance from trees, beds, walls and ponds
Setting the right clearance comes first. Clearance is the gap between the boundary wire and the edge of the obstacle. Most installation guides give different numbers for soft and hard objects, so the table below separates them. These are the figures the manufacturers publish, not a single standard, and your own mower’s manual overrides them.
| Obstacle | Wire clearance | Source |
|---|---|---|
| Flower beds, hedges, paths level with the grass | 10-15 cm (about 4-6 in) | Anker (Eufy) UK guide |
| Walls, fences and tall stones | 30-35 cm (about 12-14 in) | Anker (Eufy) UK guide |
| Pond | 35 cm (about 14 in), plus a physical barrier | Anker (Eufy) UK guide |
| Island wire to protected area (Worx Landroid) | 26 cm (about 10 in) | Worx wiki |
Robomow gives a similar split, with beds or hedges around 10 cm (4 in) and walls or tall stones around 35 cm (14 in). Its guide describes these as approximate values, so treat them as a starting point for your own lawn. Our reading is that you should measure from the edge of the obstacle you are protecting, not from the outer canopy of a tree.
Step by step: how to lay boundary wire around trees and obstacles
Once the clearance is set, the routing itself is the same for most single obstacles, so these six steps show how to lay boundary wire around trees and obstacles in order. They follow the order that the Husqvarna and Robomow guides describe. For the main perimeter loop, see our boundary wire installation guide.

- Start from the boundary. Run the outgoing wire from the lawn edge to the obstacle, keeping it clear of the other wire.
- Pick the side. If you approach the obstacle from the right, start on the right side of it, so the loop lines up with the mower’s travel.
- Circle it once. Lay the wire around the obstacle at the chosen clearance in one continuous stretch, following the Robomow advice to encircle it once.
- Keep the direction. Lay the loop clockwise, which Worx says keeps the mower from driving into the island.
- Return along the same path. Bring the wire back to the edge beside the outgoing run, so the two stay together.
- Check before you bury. Confirm the clearance and that nothing crosses, then fix the wire in place before you bury it.
On a slope, lay the wire diagonally across the incline, and where the loop turns a corner, use a smooth curve rather than a sharp angle. Both points come from the Robomow guide and help the wire stay in place under mower traffic.
Why the return wire must run beside the outgoing wire
The return wire is the part most installers get wrong, and getting it right decides whether your mower keeps working around the obstacle. Husqvarna explains that two wire runs laid close together on the return cancel the signal. That cancellation is what lets the mower pass over the double run without treating it as a boundary, while the loop still marks the obstacle as a no-go area.
- Run both legs together: the two runs should be side by side on the way back.
- Never cross them: Husqvarna warns that crossing wires mean the mower will not recognize the island, and it will stop.
- Keep one continuous loop: Robomow says obstacle wire should be outlined in a single continuous stretch with no crossings at any point.
If the mower stops at the island, check the return leg first. A crossed pair is one cause Husqvarna names, and it is easy to miss once the wire is covered by soil. If the loop looks fine but the mower still stops, see finding a break in the wire.
Large islands and passages
Larger obstacles or groups of trees follow the same method as a single obstacle, but they need more room than one loop. Worx says an island should be smaller than 6 m by 6 m (about 19 ft by 19 ft), and a larger island may not be recognized, so the mower can circle it until the battery runs out. For a bigger area, Worx leaves a 30 cm (12 in) gap between the outgoing and return wires, which keeps the area inside the main boundary instead of creating a separate island.
Robomow advises a passage of more than 70 cm (about 28 in) when it links to a remote zone, to avoid signal interference. A simple loop is still the core of how to lay boundary wire around trees and obstacles, and a passage is only needed for bigger jobs. Without the Cut-to-Edge option, Worx notes that the mower leaves a 12 cm (5 in) uncut strip between the two wires, which you can trim by hand. Plan for that strip when you decide how much grass to leave by hand.
Burying the wire and handling roots
Burying is the last stage of how to lay boundary wire around trees and obstacles. It protects the wire from the mower and from foot traffic. Anker recommends a burial depth of 3-5 cm (about 1-2 in) with a maximum of 7 cm (about 3 in), and Robomow gives an optimal depth of 4-5 cm (about 1.5-2 in) kept uniform, with signal reception still possible up to about 7 cm. If you are weighing burying against pegging, see pegging versus burying the wire.
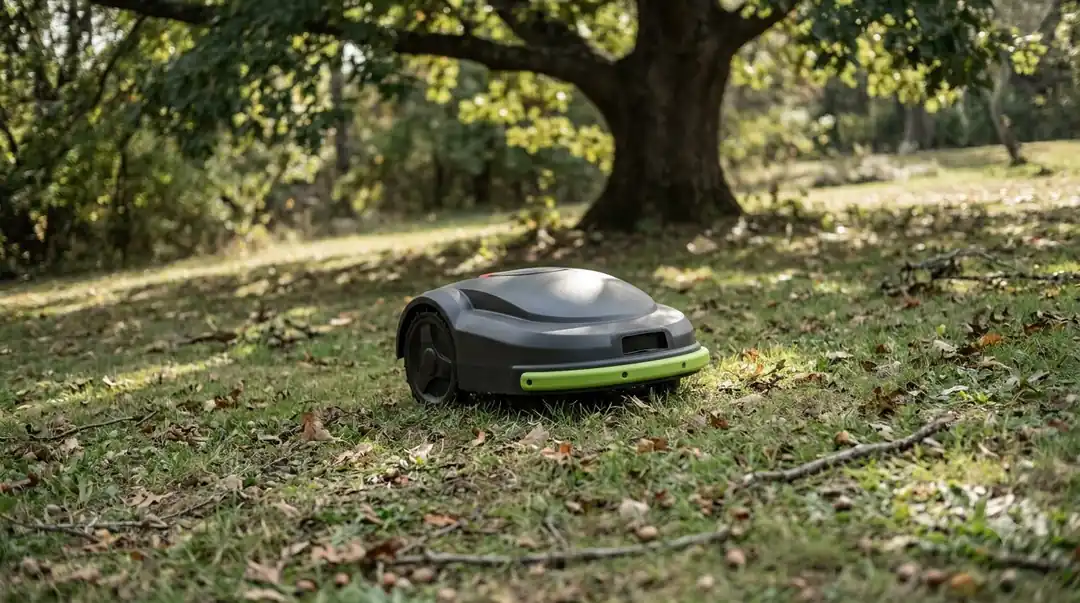
Roots are the main hazard when you lay boundary wire around trees and obstacles. Husqvarna’s advice is to avoid a tree that has visible roots, since those roots can damage the blades. If the roots are at the surface, the safer choice is an island around the tree at the clearances above.
Heads up
Clearances and burial depths differ by brand and model, so check your own mower’s manual before you start laying the loop.
Common mistakes when you lay boundary wire around trees and obstacles
Most problems come from four errors.
- Crossed wires. A crossed return leg stops the mower at the island, so keep the pair parallel.
- Wrong direction. Laying the loop counter-clockwise can make the mower drive into the island, so follow the clockwise rule.
- Clearance set too tight. Wire placed too close to a wall or bed leaves the mower little margin, so keep to the clearance table.
- Ignoring roots. A tree with exposed roots needs an island, not a bump, because roots can damage the blades.
Frequently asked questions
Do I need to put boundary wire around every tree?
No. Knowing how to lay boundary wire around trees and obstacles only matters for the objects that need an island. Husqvarna says a sturdy tree does not always need an island, because the mower turns after a gentle bump. Trees with visible roots that could damage the blades should be islanded.
What happens if the outgoing and return wires cross?
The mower will not recognize the island and will stop. Keeping the two runs together is the core rule of an island loop. Husqvarna advises keeping the runs close together and never letting them cross.
Which direction should I lay the wire around an island?
Lay the loop clockwise. Worx says this keeps the mower from driving into the island, and if you approach from the right, start on the right side of the obstacle.
How deep should the boundary wire be buried?
Burial is the final step. Anker recommends 3-5 cm (about 1-2 in) with a maximum of 7 cm (about 3 in). Robomow gives an optimal depth of 4-5 cm (about 1.5-2 in) kept uniform along the whole loop.
Sources
- How to create islands in a boundary wire Automower installation (Husqvarna): islands for beds, trees and roots, closing the loop.
- Setup An Island (Worx wiki): 26 cm clearance, 6 m by 6 m limit, clockwise direction, 30 cm passage gap.
- Robot lawn mower boundary wire installation (Anker, Eufy UK): clearances by obstacle and burial depth.
- Laying the lawn boundary wire (Robomow): encircling obstacles, slopes, corners and burial depth.
 Up next8 min readBy YardShould You Bury or Peg Robot Mower Boundary Wire?Updated Nov 11, 2026
 8 min readBy YardHow Much Boundary Wire Do You Need for a Robot Mower?Updated Nov 11, 2026
 8 min readBy YardRobot Mower Around Flower Beds: How to Keep It OutUpdated Nov 11, 2026
 9 min readBy YardCan a Robot Mower Mow Around a Pool Safely?Updated Nov 11, 2026
 8 min readBy YardRobot Mower Under Trees: What Changes and What to DoUpdated Nov 11, 2026
 8 min readBy YardHow Does a Robot Mower Handle Trees?Updated Nov 11, 2026