


A robot mower wire tensioner is not a standard accessory, and most owners do not need one. The installation guides we read keep perimeter wire tight by pegging it flat to the soil, leaving a little slack at corners and connectors, and avoiding sharp bends. This guide explains how that works in practice, what a loose run does to your mower, and what to check before you bury the wire.
The short answer
- No dedicated clip-on tool: the sources we read describe pegging and layout, not a separate tensioner device.
- Peg about every 1 metre: one installation guide gives that spacing for keeping the wire flat.
- Leave slack on purpose: a little give at corners and near connectors makes later adjustments easier.
- Test before burying: run the loop above ground for 2 to 3 weeks first.
Why people search for a robot mower wire tensioner
A robot mower wire tensioner is the first thing many owners look for when the loop misbehaves. Most of the searches behind this topic come from owners who see wire lifting after a few weeks, or who find the wire bunched up after a cut. A tensioner sounds like the obvious fix, because it would pull the wire straight. In the guides we read, though, the wire stays straight because it is held down along its whole length, not because it is pulled hard at one point. A tensioner only matters once the loop is laid, so it helps to start from the boundary wire options for a larger loop and the lengths they come in.
That matters because a wire that is pulled tight and then pegged in only a few places can lift at the gaps. The fix is to add pegs and to lay the wire flat, not to add tension.
Pegging the wire flat is the real method
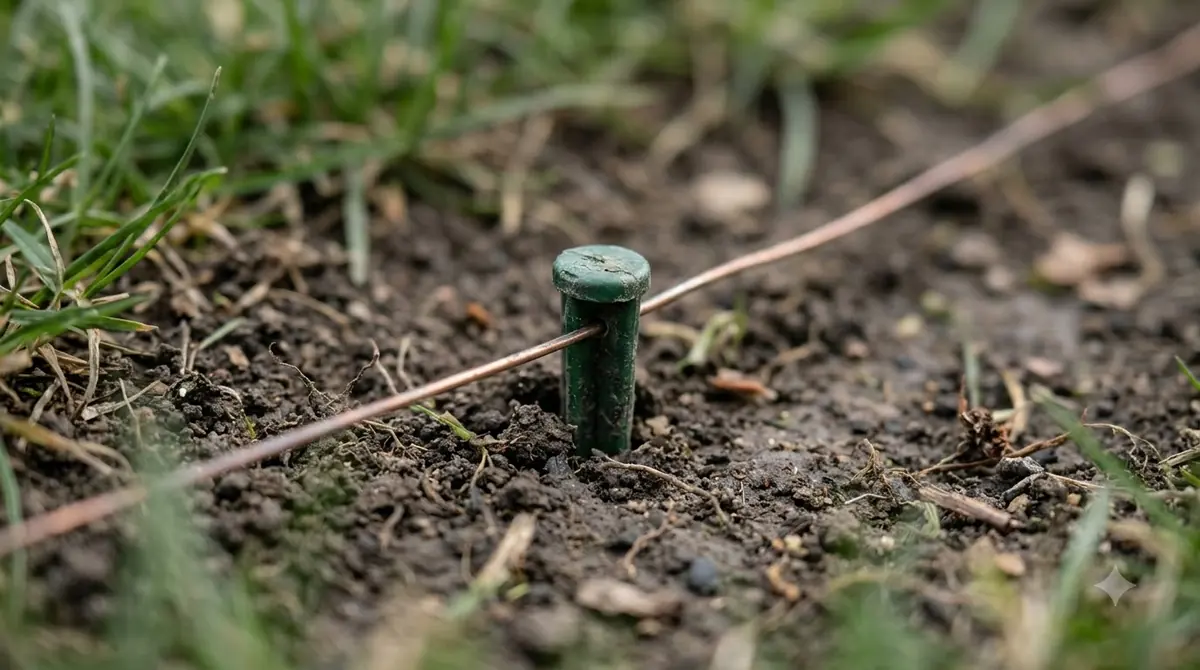
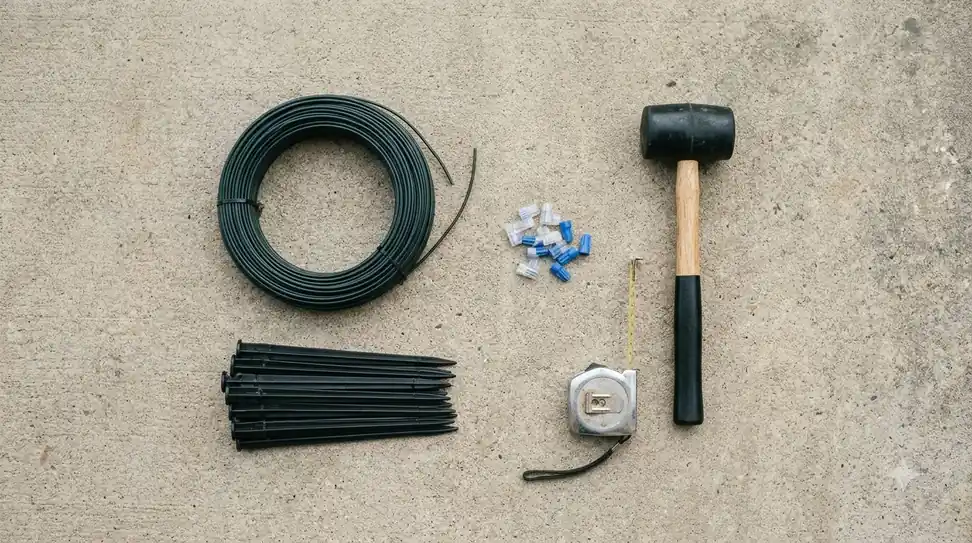
Pegs hold the wire firmly and flat against the ground. The GroundTech installation guide we read says to space them about 1 metre apart and gives no other spacing. Use the pegs that came with your mower, and press each one in until the wire sits against the soil without a gap. Flat contact with the turf comes mainly from wire pegs that hold the cable flat at regular spacing, not from pulling the cable tight. Some installers prefer stapling the wire into the turf with a purpose-made tool, which fixes the cable at many small points instead of a few large ones. Pegging the wire flat is the manual method, while laying boundary wire with a machine is the faster alternative worth comparing on longer perimeters.
If the wire keeps lifting at the same spot, add an extra peg there before you change anything else. Loose wire over a dip is the usual cause, and a single extra peg often fixes it.
Slack at corners and connectors
The same guide advises leaving a little slack in corners and near connectors. That slack is not a mistake. It gives you room to move a peg or reconnect a splice later without pulling the whole loop out of shape. Slack at a connector often shows up where a joint has been rushed, and splice joins at loose connectors are a common source of intermittent signal loss.
Keep the slack small. A long loose loop can still get caught by the blades or lifted by birds and frost, so the goal is a wire that lies flat with a small amount of give where you expect to work on it.
Bends, crossings and overlaps
Sharp bends, crossed wires and overlapping loops can confuse the mower’s sensors, according to the GroundTech guide. Round off the corners instead of folding the wire sharply, and do not let two runs cross each other. Crossings and overlaps add extra cable length, so it is worth understanding wire gauge for longer boundary runs before adding more bends than needed.
For obstacle islands, lay the outgoing and return runs directly side by side. Keeping them together is the layout the guide describes, and it avoids a wide loop that the mower may read as a second boundary.
Check the loop before you bury it
Anker’s installation guide recommends keeping the wire 30 to 35 cm from solid obstacles such as walls, fences and raised beds, so the blades do not strike them. It also suggests running the wire above ground for 2 to 3 weeks before you bury it. During that trial, watch for clipped edges and uncut strips. If part of the loop has already been covered by soil, locating a buried wire before digging can save a lot of unnecessary lifting of turf.
If the mower clips the edge, move the wire outward a few centimetres. If it leaves a strip uncut, bring the wire in slightly. Once the route works, bury the wire only at the depth your guide recommends.
Signs the wire needs attention
Three patterns tell you the loop needs work, and none of them is solved by pulling harder on the wire. The first is wire that lifts a few centimetres off the soil after rain or frost. Add a peg at the lifting point and check again. The second is a mower that keeps stopping at the same spot, which often points to a kink, a crossed run or a loose connector near that point. The third is a strip of uncut grass along one run, which usually means the wire sits too far inside the edge. When the mower reports a lost signal, a break finder for a faulty loop narrows down which stretch of cable has actually failed.
Work through these one at a time, and mow a full cycle after each change. Changing two things at once makes it hard to tell which one helped.
Soft ground needs a closer look. In wet weather the pegs can pull loose or sink, and the wire then drops into the grass. Check the pegs after heavy rain for the first month, and replace any that have worked loose. A peg that is bent or cracked should be swapped rather than bent back into place, because a weak peg lets the wire lift again.
Once the wire is pegged and the loop is clean, bury it at the depth your guide gives, then recheck the route after the first heavy rain. A robot mower wire tensioner would not change that step, so the time is better spent on the route itself.
Frequently asked questions
Is a robot mower wire tensioner worth buying?
The guides we read do not describe a dedicated tensioner. Pegging flat, adding pegs where the wire lifts, and leaving slack at corners is the method they recommend.
How far apart should the pegs be?
The GroundTech guide suggests about 1 metre. If the wire keeps lifting, add pegs between the existing ones.
Should I bury the wire right away?
No. Anker suggests a 2 to 3 week trial above ground first, so you can correct the route before burying it.
Why does my boundary wire keep lifting?
The usual causes are too few pegs, a dip in the ground, or slack that sits loose over a low spot. Add pegs at the lifting point and check the wire flat against the soil.
Sources
- GroundTech (installer): peg spacing about 1 metre, slack at corners and connectors, avoiding sharp bends and crossed wires.
- Anker (mower brand): 30 to 35 cm from solid obstacles, and a 2 to 3 week above-ground trial before burying.
 Up next6 min readGearUV-Resistant Cable Ties for Robot Mower Perimeter Wire: What to CheckUpdated Nov 12, 2026
 8 min readGearBest Robot Mower Boundary Wire 500 ft: What to Check Before You BuyUpdated Nov 11, 2026
 8 min readGearCable Cover for RTK Antenna Wire: 5 Checks Before You BuyUpdated Nov 19, 2026
 9 min readGearRobot Mower Boundary Wire Repair Kit: What to Check Before You RepairUpdated Nov 19, 2026
 6 min readGearRobot Mower Lawn Edging Strips: 3 Simple Setup StepsUpdated Nov 14, 2026
 6 min readGearRobot Mower Outdoor WiFi Extender: 3 Simple TestsUpdated Nov 20, 2026